In this section you will find all the useful resources to: better structure the contents of your talk, make it interactive and accessible. You will also find specific useful specifics for online events: indications on how to choose whether to pre-register your speech, practical advice and tools for how to do it.
How to make your talk interactive and not boring
Here are some little tips to make your talk interesting:
It is not necessary to say everything
You will certainly not be exhaustive but you can be very effective if what you say you say it well.
Fall in love with storytelling
Today it is almost on everyone’s lips (and texts). Any presentation is the telling of a story. You will have to build it. So, learn (well) and use storytelling. It will be an infallible weapon.
Surprise
How many times have you got distracted, thinking about something else or turning off your brain, when you found yourself listening to concepts already known in ways you have already heard thousand times. Be creative. Get out of the box and dare. The return you will have will surprise you too!
Transform anxiety into energy
Try channelling performance anxiety into energy. Breathe and focus on the significance that what you are about to tell your audience has for you. Passion can also be expressed in engaging words that excite your audience.
Besides what you say it counts how you say it. You!
Everything you have always read about diction, tone of voice, modulation, posture, is always useful. So treasure all the information you’ve gathered but stitch it on yourself. Model them based on your personality. Remember that even the best of advice won’t work if it’s too far away from you. You must always be credible!
The rule of 3
This technique is linked to some memorization mechanisms of the human brain (such as the transcription of important steps, also with the use of concept maps and visualization) and the skilful use of pauses.
Very simple: we divide our speech into three essential parts, three points, three basic concepts.
The first two will have a purely preparatory function;
The emotional charge (or accent) always falls on the third point, which constitutes the true fulcrum of the discourse, the gravitational centre to which it was planned to arrive from the beginning.
Structurally similar to the three postulates of the Hegelian dialectic:
- Thesis
- Antithesis
- Synthesis
In reality, “the rule of three” is more of a principle that allows you to memorize a message in a quick and even fun way.
Simply put, three is easy and it works.
Source: webinarpro.it/2019/05/public-speaking-classico-o-rivolution (link no more available)
How to structure your talk
Relative to the structure, taking up the rule of 3 that we mentioned above, we would like the talk to be divided into 3 parts, so we could get three videos during the editing phase that we can publish on our channels. It is not mandatory, but if you can, consider the idea. If you are unable to structure the talk in 3 sections, you could also structure it in two.
Make your slides accessible
Accessibility is a very important issue for us at GrUSP and we try to pay close attention to this issue to ensure that anyone can feel at ease and can take full advantage of the contents during our events.
Here is a short bulleted list of useful and simplified tips on how to make an accessible presentation. If you wish, you can learn more about this topic in this video (in italian) from which we have taken the indications that we report below.
Here are some simple rules for making accessible and inclusive slides:
- use a simple, clear, readable and accessible template. You can take inspiration from ready-made templates such as those of Power Point and the accessibility checker;
- use an accessible and legible color contrast. Here is a tool you can use to check the effectiveness of the contrast: coolors.co;
- color is not the only way to convey a concept. Make sure you give clear and not unique references. Eg the traffic light has indications of both color and position which make the message clear even to those who might be color blind;
- if you use icons or symbols, clearly indicate the legend to explain what they refer to;
- uses Alt Text to allow people using a screen reader to understand the content of the slides;
- define and arrange your “Reading Order” that is: set the size of the titles based on importance (H1, H2 etc.). Screen readers describe content in the order in which it was created. To make sure your content is accessible and read in the correct order, be sure to prioritize by formatting the text correctly;
- use a legible and simple font, with a fairly large size. Avoid using strange or particular fonts and making slides with text only, rather break the content into multiple slides;
- if you do live coding, remember to enlarge the screen to make it readable. You can use programs like ZoomIT;
- if you insert a table make sure to insert the header and above all to make the information clear and simple;
- if you insert a link, prefer “talking” short links. Also use a QRcode if attendees need to reach that page during your talk;
- use diverse images to make your presentation inclusive and diverse. Here are some website where you can download diverse images: Disabled and here, The Gender Spectrum Collection; nappy, CreateHER, TONL, Body Liberation Photos, WOCinTech Chat.
- if you insert a video make sure to make it accessible for the visually impaired and hearing impaired by describing the scenes with a narrator and using subtitles.
We hope that this short bulleted list will be useful to better prepare your talk. If you need support do not hesitate to ask us for suggestions, we will be happy to help you.
Accessible public speaking
After having seen how to create an accessible presentation, it is time for public speaking, and therefore for displaying the contents to the public.
Below you will find a short bulleted list with some indications to better communicate. You can learn more about the topic in this video (in italian) from which we have taken the following indications.
Communicate in an accessible and inclusive way:
- share your slides on joindin before your talk in order to make them accessible to those who participate and follow the presentation at the moment of your speech;
- if you use images or animations, don’t assume that people see them clearly, explain the slide and tell it. Maybe there are those who are just listening and have no chance to see;
- use inclusive and accessible language. Prefer agender terms (without gender references) and don’t assume that anyone can know the acronym you are using using technical terminology suitable for the audience that is listening. What may be clear in the context you work in may not be clear in others;
- make sure you catch your breath and don’t speak too fast or too softly, especially if real-time subtitles are used. Use a dynamic and active tone of voice but beware of large changes in pitch, they could cause problems for people with hearing problems;
- pay attention to cultural differences. Don’t assume that what is common (or funny) to your culture may also be common to someone with a different background. If you are not sure that what you are saying is clearly understandable by people of different ethnicities, cultures or religions, ask who is organizing the conference or contextualize your message well;
- remember that there is a code of conduct to respect, avoid inappropriate jokes or that could harm the sensitivity of those who participate;
- structure your slides for effective communication: set the goal before starting, design the structure, a concept per slide: simplify to amplify, create your own formats, design slides tailored for you, create a color scheme and fonts, a hierarchy and choose where to direct your gaze on the slide, let the images speak, help understanding and memory and respect empty spaces: they help the eye to focus on the message.
Some useful details to present your online talk:
- uses subtitles and services that allow you to create them in real time such as Power Point or Google Slide;
- use an instant translation service to allow anyone to follow your post as translator.microsoft.com
For online events
Live talk or pre-recorded?
It is up to you to choose the option that makes you feel more safe and comfortable.
Live talk
If you are planning to do your live talk please note the following:
- You will need to share a full-screen presentation. If you only have one screen and use Keynote / Powerpoint, you should share the whole screen. If, on the other hand, you use Google Slide or another web service, you can only share the browser tab and we have seen that it is more convenient.
- If you need to do live coding sessions or change often from one screen to another, consider pre-recording your talk, it could be much easier and we will help you with the editing if you need it.
- Check your internet connection and make sure you are in a quiet place, away from any sources of noise.
- Use a pair of headphones or a microphone to make sure there is no background noise.
- Make sure you have no light sources behind you, you risk not being visible on the webcam.
- Make a backup copy, just to be safe;
- uses subtitles and services that allow you to create them in real time such as Power Point or Google Slide;
- remember that we will need to receive the slides a week before the conference in order to give you feedback on how to make them more interesting for our audience.
Pre recorded talk
If you prefer to pre-record your speech, we would still like you to be live: before your talk for a short introduction, and after for the Q&A. If you need technical help with registration or anything, just ask, we’re here to help!
A pre-recorded video allows you to use creativity in editing, or for example, insert code demos without the stress of doing live coding; it also allows you to interact with those who participate in chat during the video itself.
Below you will find all the information on how to best record your talk.
Adding subtitles to your video would be very nice, for accessibility reasons, we can help with that too.
Deadline for delivery of recorded talks: remember that we need the video of your talk within two weeks of the start of the conference, and even a few days before if you need to edit it.
Technical tests
In any case, we will do some test sessions, before the event, to meet, coordinate, and see together the tools and platforms we will use, so don’t worry, we will see everything in detail.
If your talk is live, please use Google presentation to enable live captioning
If your talk is live we can’t provide live captioning as if you decide to pre record your talk. Accessibility for us is really important therefore we ask you to use Google Slides Presentations to abilitate live captioning.
Here is a clear and simple guide focused on how to create live captions if you decide to make your talk live, directly from your Google Slides presentations.
- Before sharing your screen on Streamyard, open your presentation on the Google Slides page
- Click the arrow button next to the Present button
- Choose Presenter view
- On the Presenter View screen hover over the bottom of the page and click the Captions button [CC]
- Start speaking and the captions will appear automatically. Be sure to speak clearly and at a normal speed. Sharing your screen and your audience will be able to watch the presentation as well as the caption.
Resources:
Template to pre-record your talk
The recorded video of your talk should have the layout you see on your right, you can download it directly here.
During the live broadcast we will insert the girth with your name at the bottom.

You can decide to send us the video in 2 ways:
- two separate recordings: one for the face / half-length and one of your screen / presentation / demo. We will perform the editing of the two recordings;
- video already edited by you, using the layout indicated above.
Tool to record video and screen separately
If you decide to record video and screen separately you will need to send us 2 files:
- the video file with the registration of your bust;
- the video file with your screen recording / presentation / slide / demo
To register the bust:
With a webcam, some useful tools:
– QUICKTIME PLAYER: pre-installed on mac
– PHOTOBOOT: pre-installed on mac
– CAMERA: pre-installed on windows
– FILMORA: for mac and win, free and paid version (filmora.wondershare.com)
– WEBCAMERA.IO: no software, from browser (only chrome and firefox)
– OBS: for mac and win (obsproject.com)
With smartpone some useful tips:
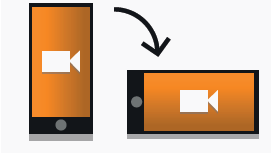
turn the smartphone horizontally, use a support for a fixed and non-moving shot.
⭐ Make sure you also record audio. You can do this via the built-in microphone of your PC, smartphone or photo / video camera. You can also use an external microphone if you have one available.

Screen recording tool:
– QUICKTIME PLAYER: pre-installed on mac
– ISTANTANEA SCHERMO: pre-installed on mac
– GAME DVR: pre-installed on windows
– ICECREAM SCREEN – RECORDER: for mac and windows. free and paid version: icecreamapps.com/Screen-Recorder
– FILMORA: for mac and win, free and paid version (filmora.wondershare.com)

Insert subtitles
Subtitles help us to make the use of the content more accessible. Here is a brief guide on how to make them:
- Format: the required format for subtitles is .srt, .doc / .docx or other formats are not suitable;
- Tools: There are several online tools that can be used to make subtitles and turn audio to video such as: otter.ai – happyscribe.com – trint.com
How the .srt format is structured:
It is made up of 4 parts only text structured in this way:
- an incremental number than the subtitle sequence;
- the precise minute / second that appears on the screen;
- the subtitle sentence;
- a blank line indicating the start of a new subtitle.
Example:
1
00:00:00,498 –> 00:00:02,827
Here’s what I love most about food and diet.
2
00:00:02,827 –> 00:00:06,383
We all eat several times a day, and we’re totally in charge
If you send the video already edited
You can send us the video already edited by you. It is important that you use the layout shown above.
You can edit it with the video editing software of your choice.
If you don’t want to make 2 recordings and do the editing, some services allow you to record at the same time, to have the final file ready:
- STREAMYARD: (streamyard.com) online, no software downloads. (to register: basic plan – 20 $)
- OBS: for mac and win (obsproject.com) streaming and recording software. You will need to set up the layout shown above.
Save and send
Create a folder and rename it like this example: MarioRossi_cssday2021
Create the subfolders and insert the files inside: 01_Mezzobusto, 02_Screen
Make sure all files have been copied inside and zip the folder.
Send all documentation to: video@apropos.srl with wetransfer (or other service) or share a Drive folder. Remember to also copy the email of the conference from which you receive the information relating to your participation.
